Private modded server onboarding

3 simple phases26 matched mods0 game passwords

The complete setup, narrated

4 minutes 17 seconds

Written walkthrough

Follow the pictures, one click at a time.

Complete each phase in order. The exact values can be copied directly from the steps.

Phase 01

Join the private network

Tailscale makes the server reachable without opening it to the public internet.
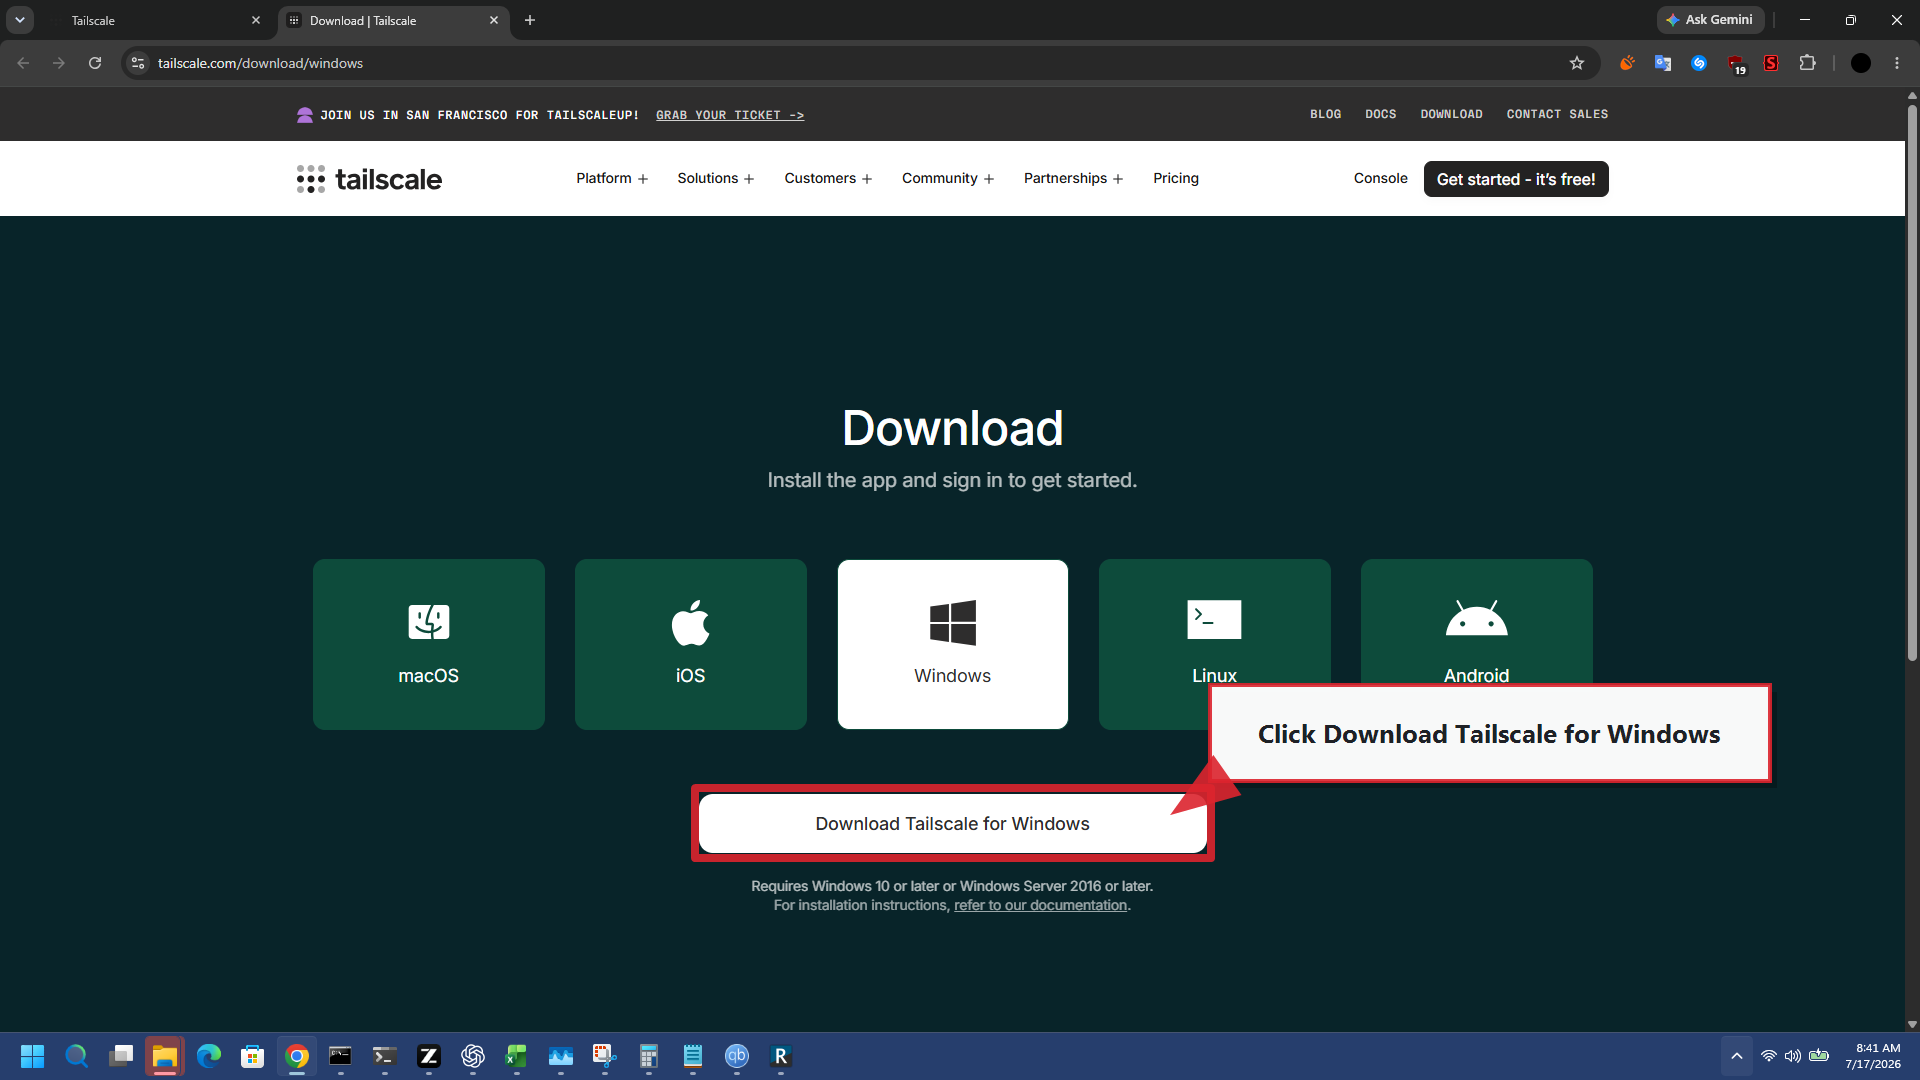
Tailscale Windows download page with the Windows download button highlighted
STEP 01

Install Tailscale for Windows

  1. Open the official Windows download page.
  2. Select Download Tailscale for Windows.
  3. Run the installer and accept the normal Windows prompts.
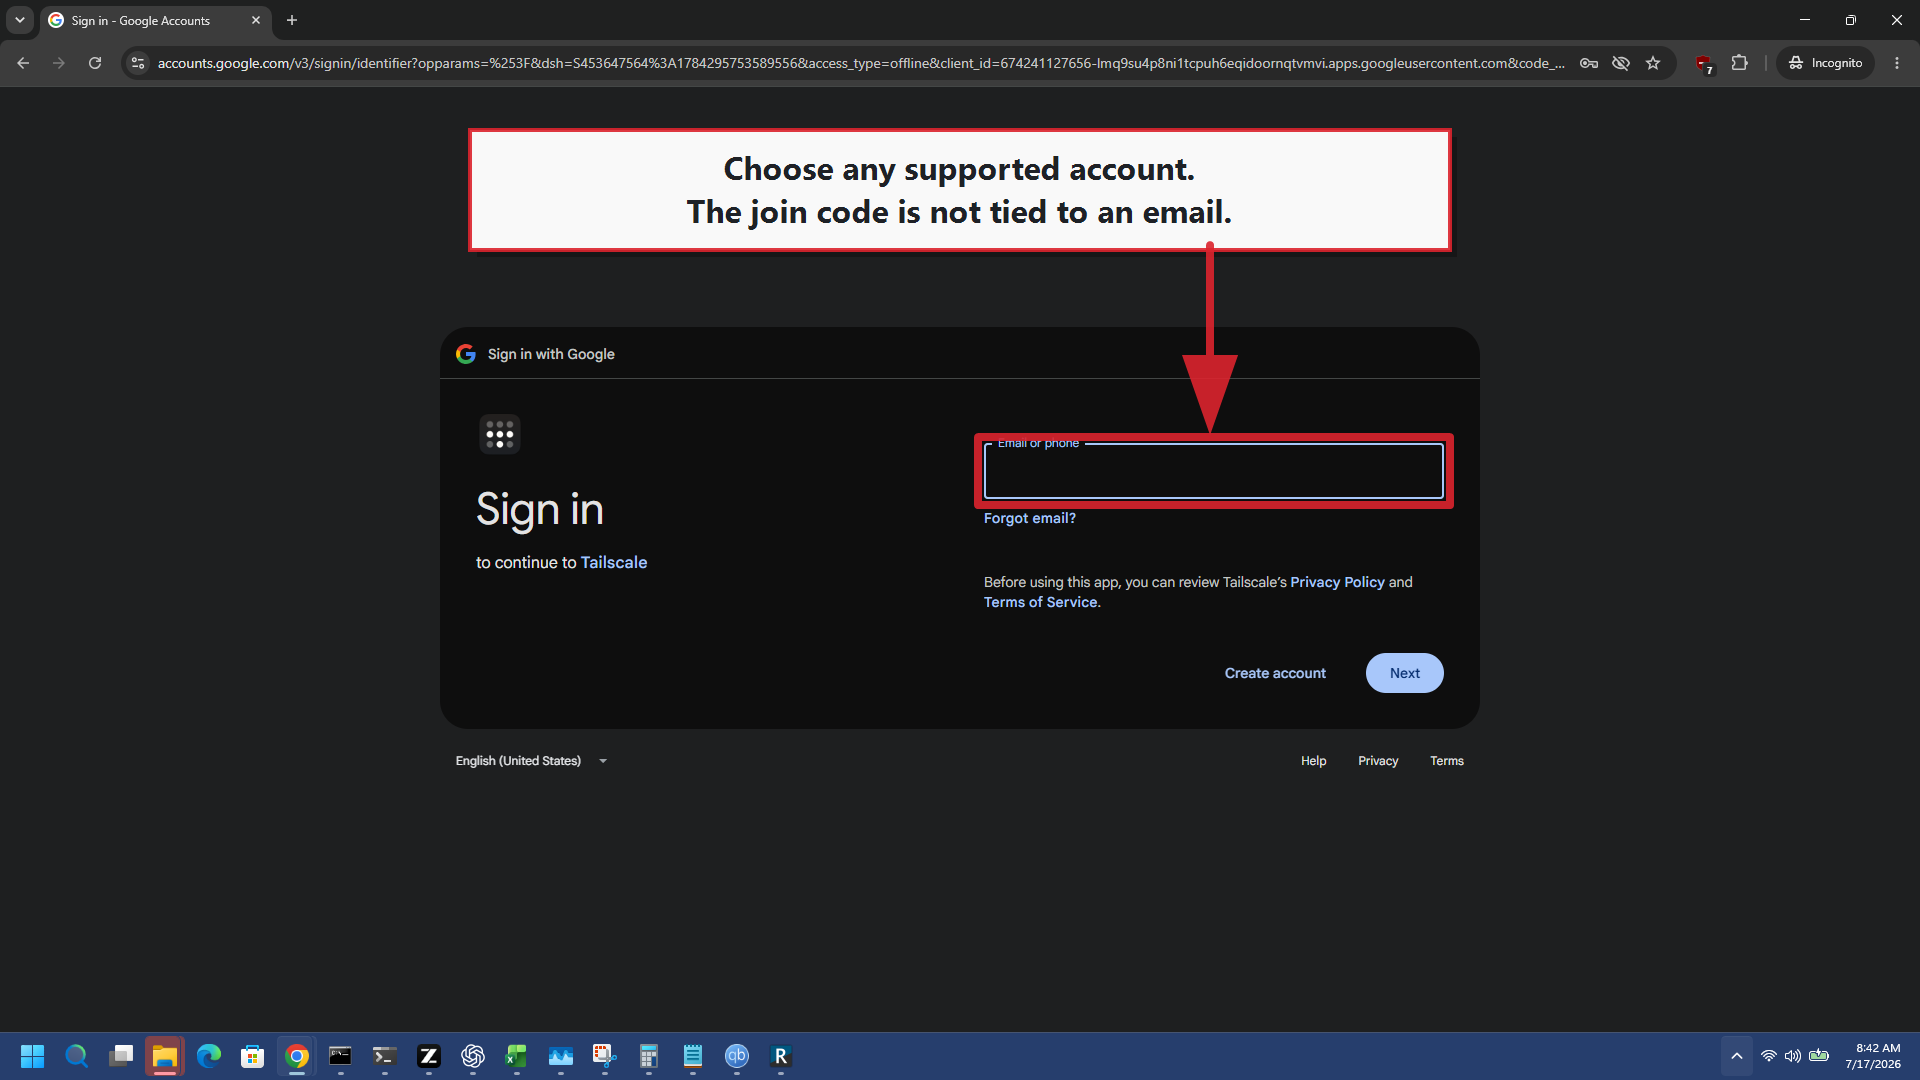
Google sign-in page reached from a Tailscale invitation
STEP 02

Open the invite listed for your name

  1. Open the invite beside your name.
  2. Choose any supported sign-in provider you want to use.
  3. Approve joining the VALHEIM network.
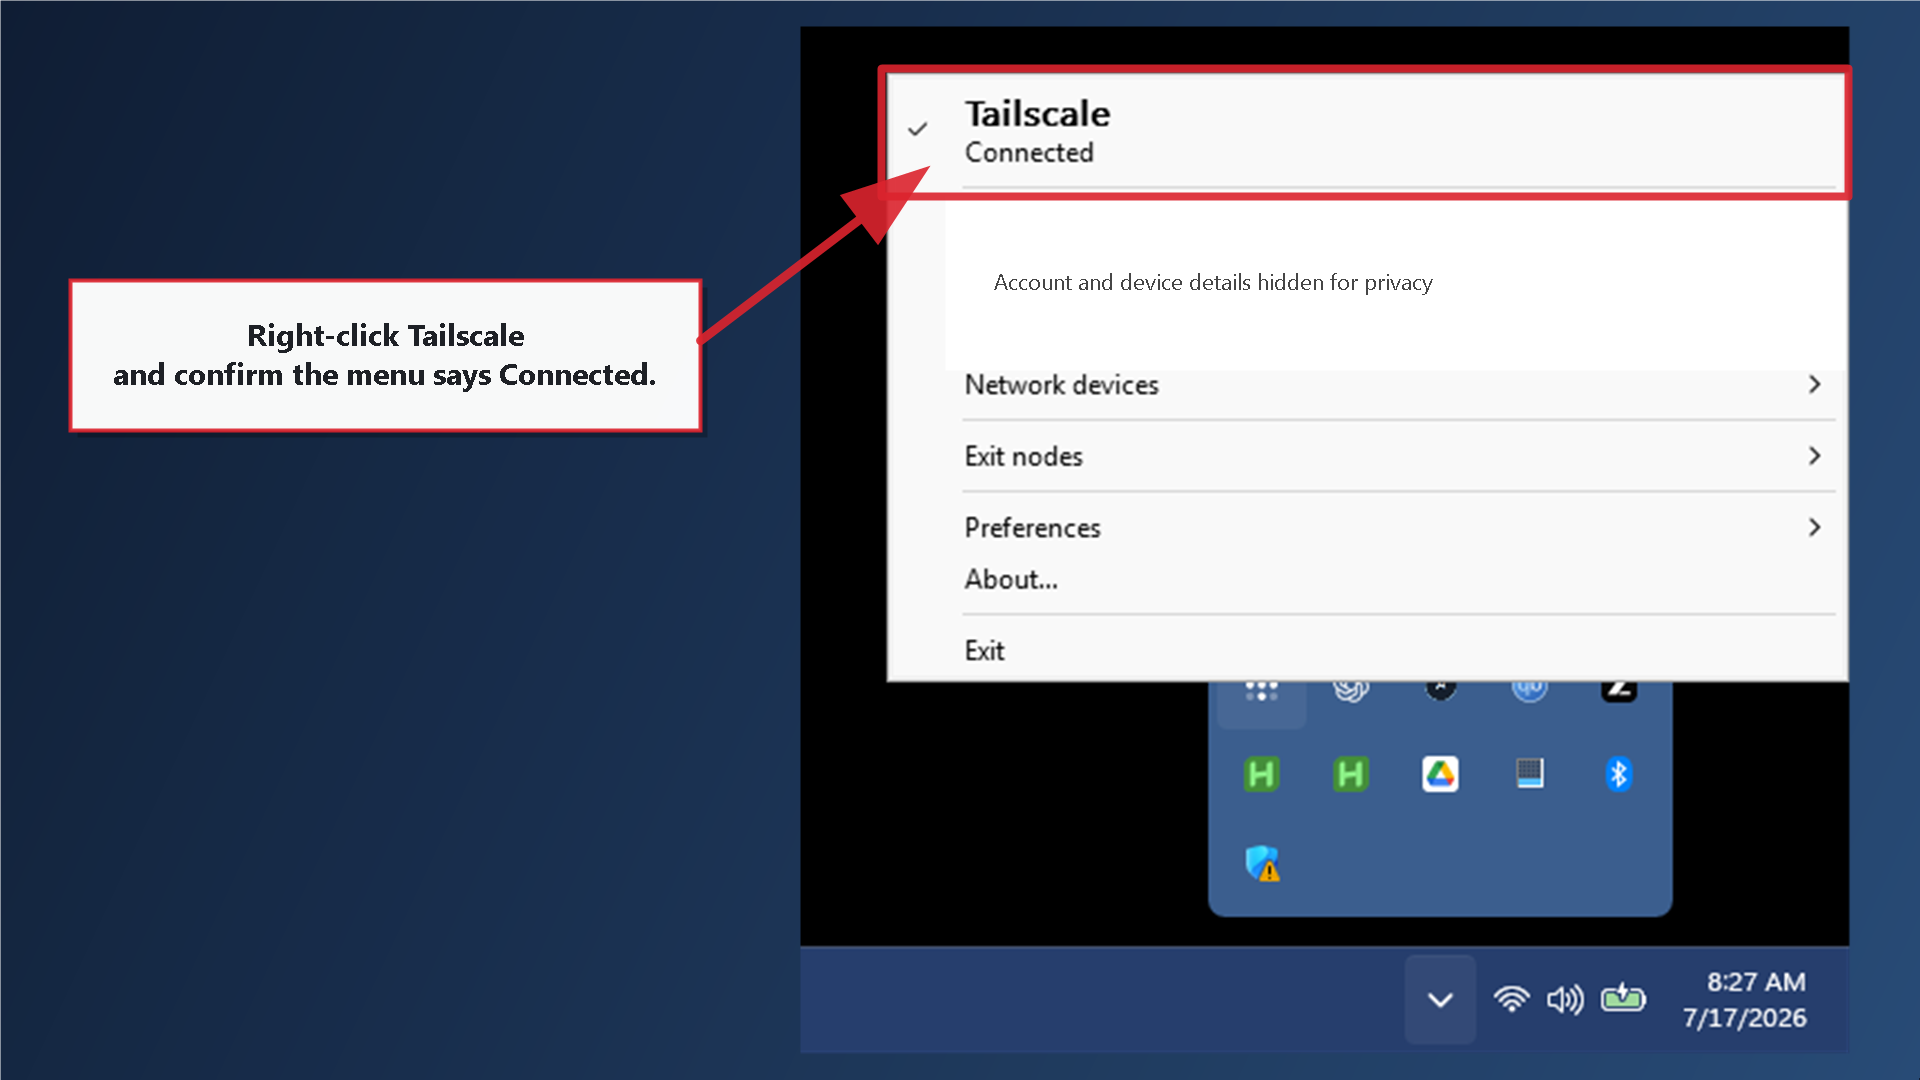
Tailscale menu showing Connected in the Windows system tray
STEP 03

Confirm Tailscale is connected

  1. Open the hidden-icons arrow near the Windows clock if necessary.
  2. Right-click Tailscale.
  3. Confirm the menu says Connected.

Phase 02

Install the exact mod profile

r2modman downloads all 26 required mods from one profile code and keeps them together.
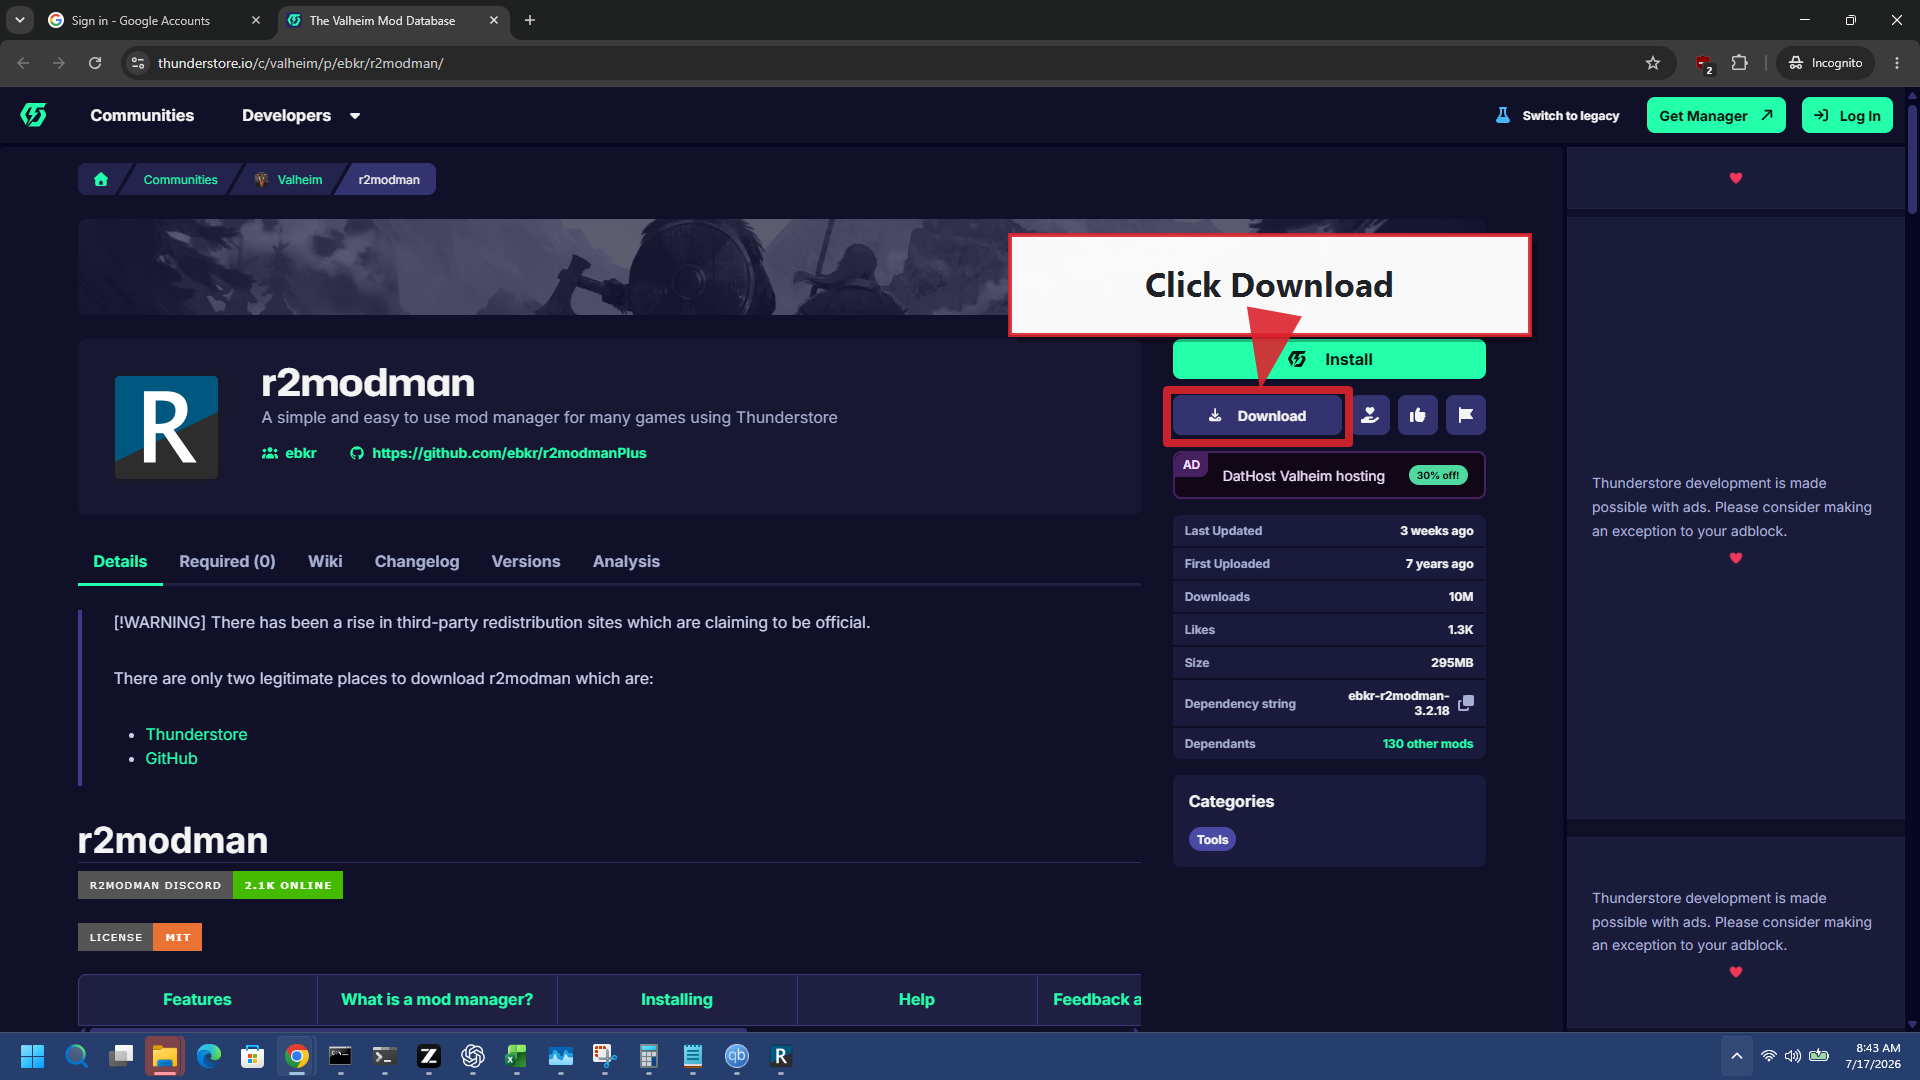
Official Thunderstore r2modman page with Download highlighted
STEP 04

Download r2modman

  1. Open the official r2modman page.
  2. Select Download and install the app.
  3. Open r2modman, then choose Valheim and Steam.
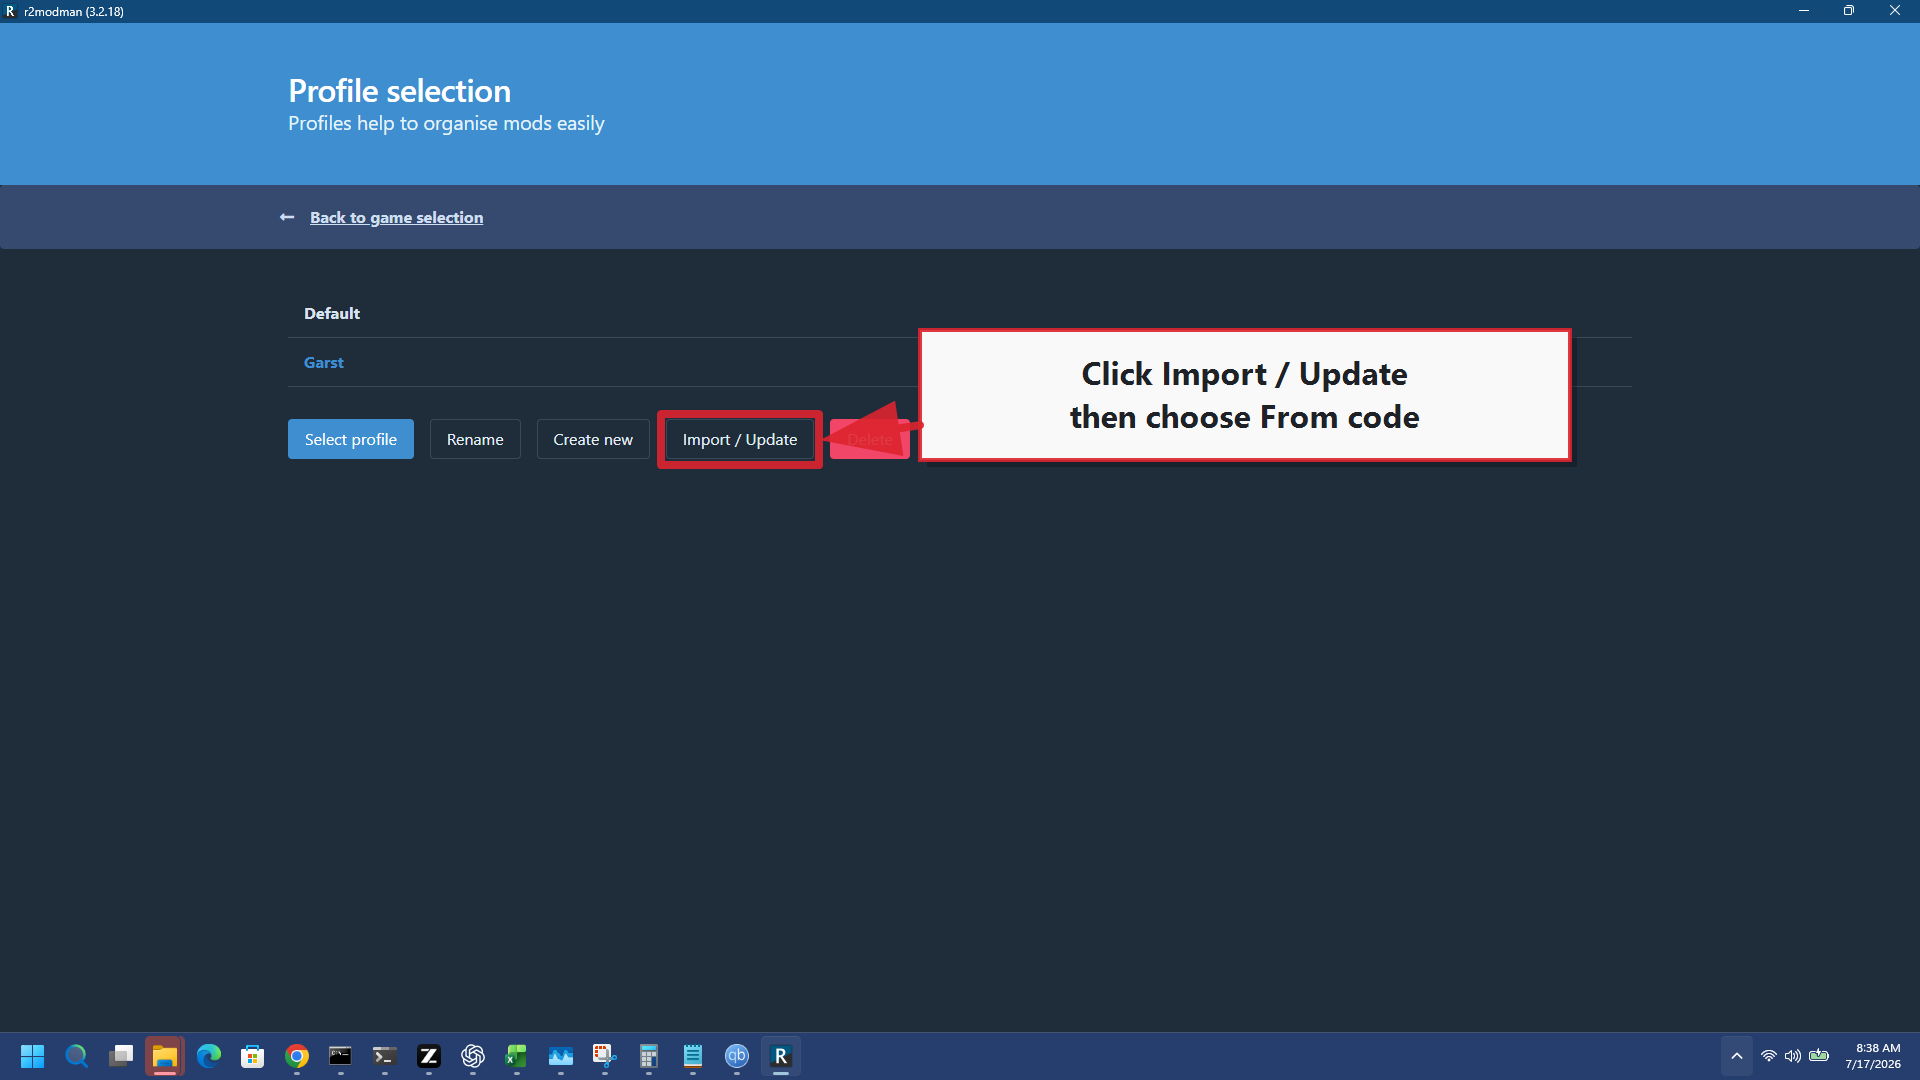
Current r2modman profile screen with Import or Update highlighted
STEP 05

Choose a profile and start the import

  1. Use the Default profile or create a new profile with any name.
  2. Select Import / Update.
  3. Choose From code.
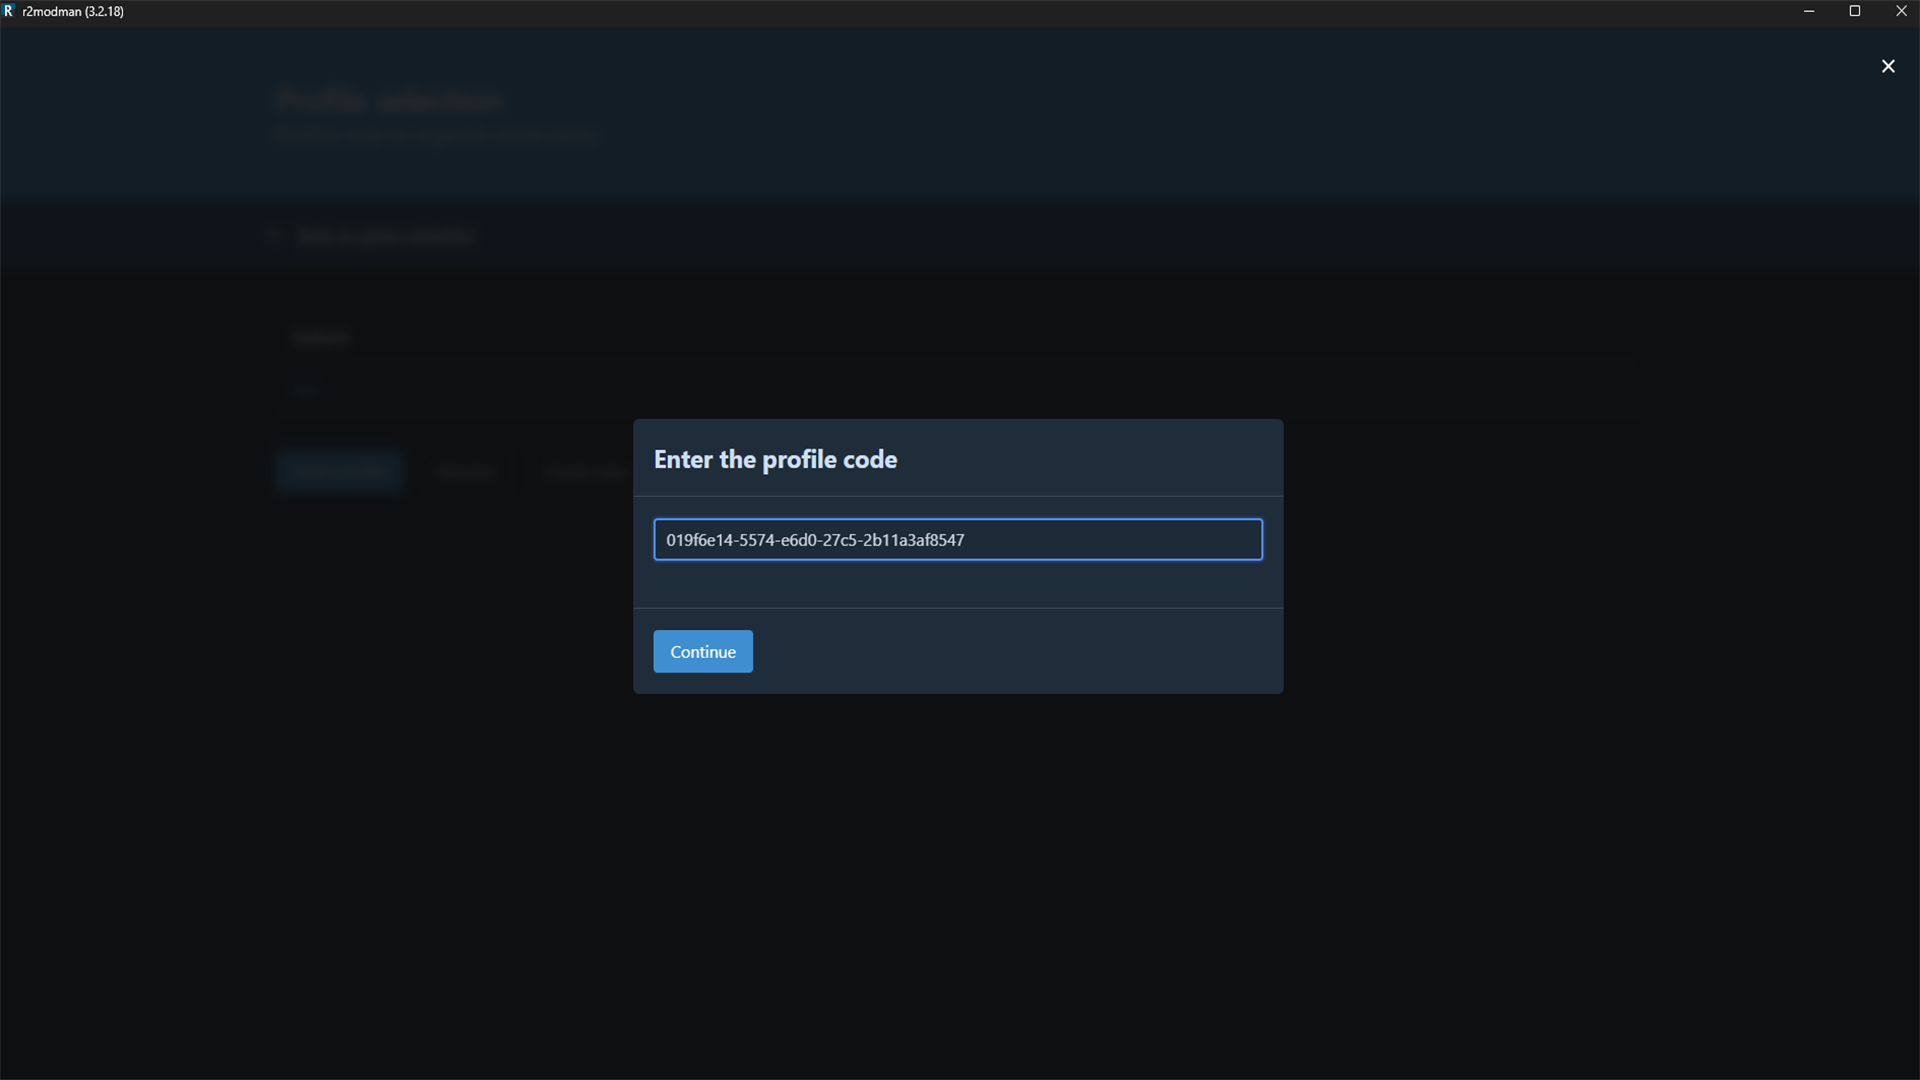
r2modman profile-code dialog containing the complete import code
STEP 06

Paste the profile code

Profile code
019f6e14-5574-e6d0-27c5-2b11a3af8547
  1. Paste the complete code, including every dash.
  2. Select Continue, review the package list, and complete the import.
  3. Wait until r2modman reports 26 installed mods.
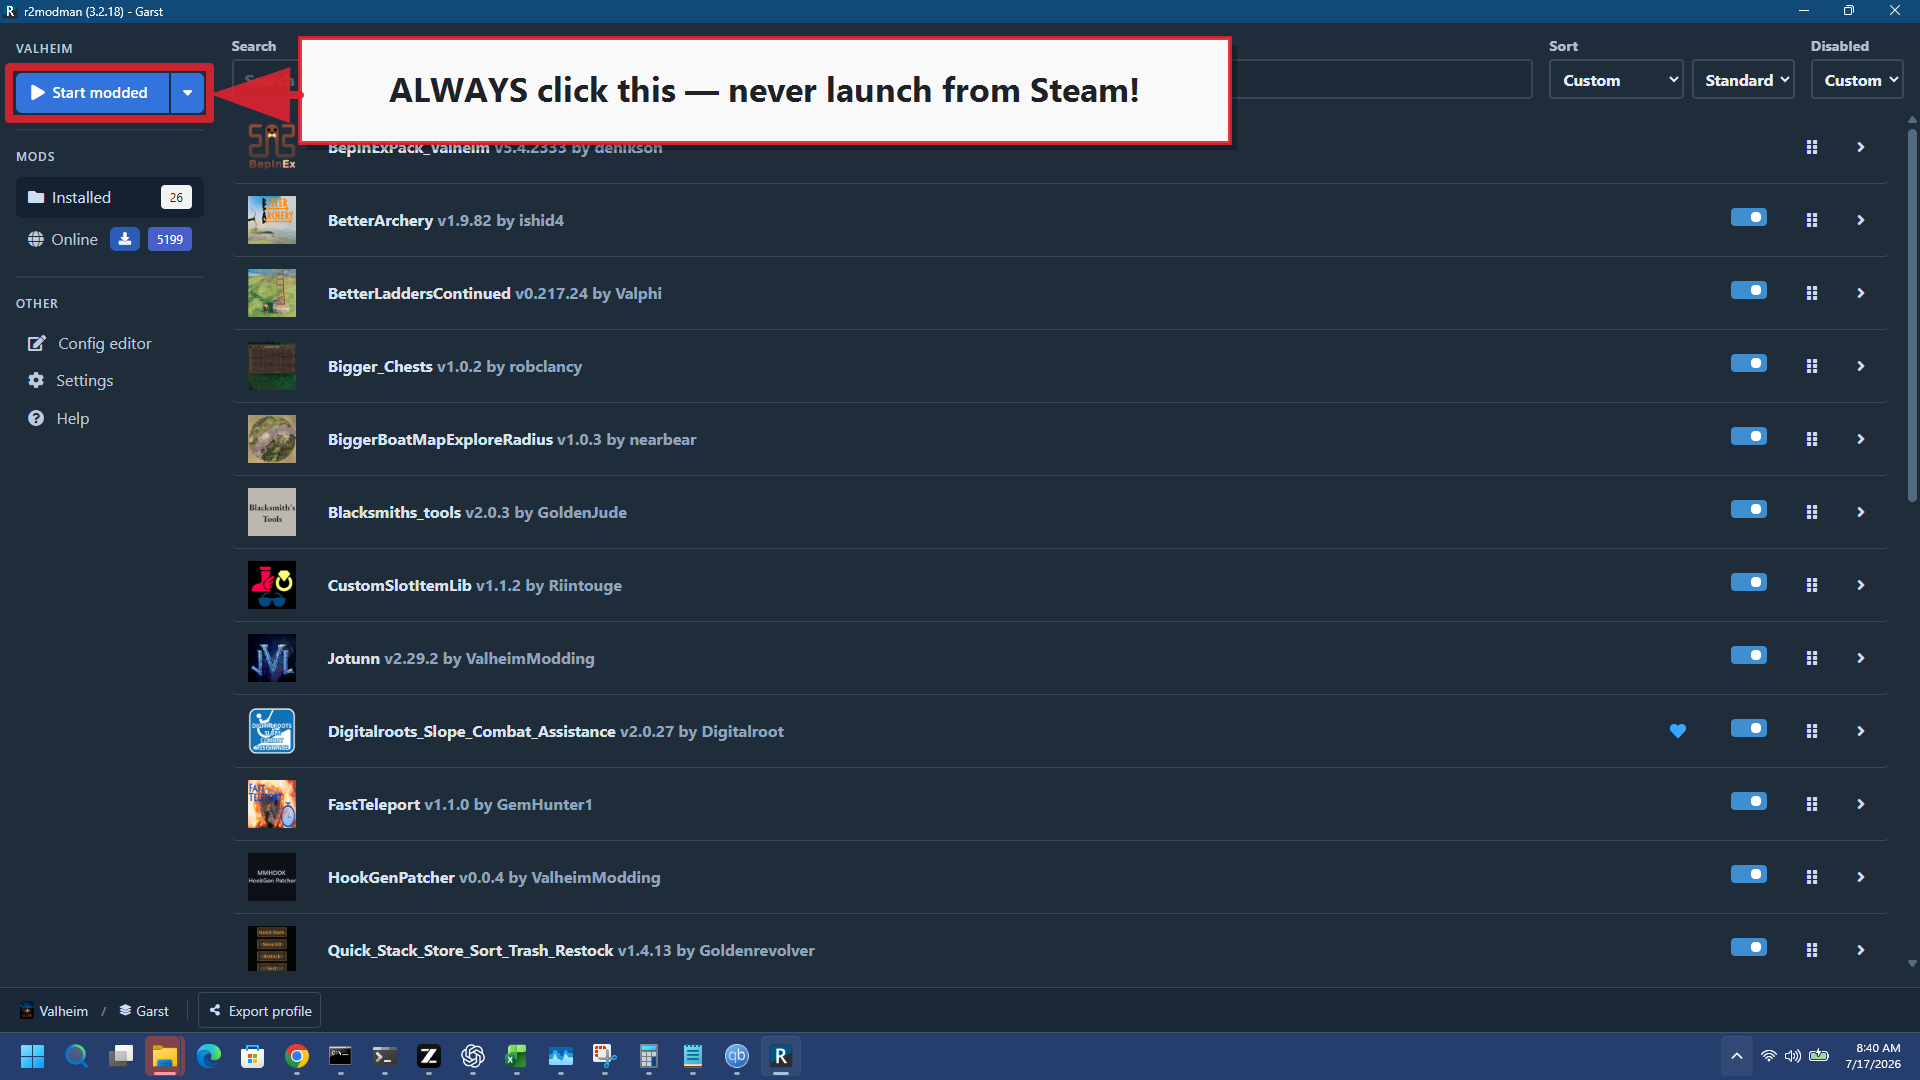
r2modman with Start modded highlighted
STEP 07

Always choose Start modded

Select the profile you imported, then choose Start modded in the upper-left corner.

Phase 03

Connect from Valheim

Launch through r2modman, select a character, and enter the hostname or IP address.
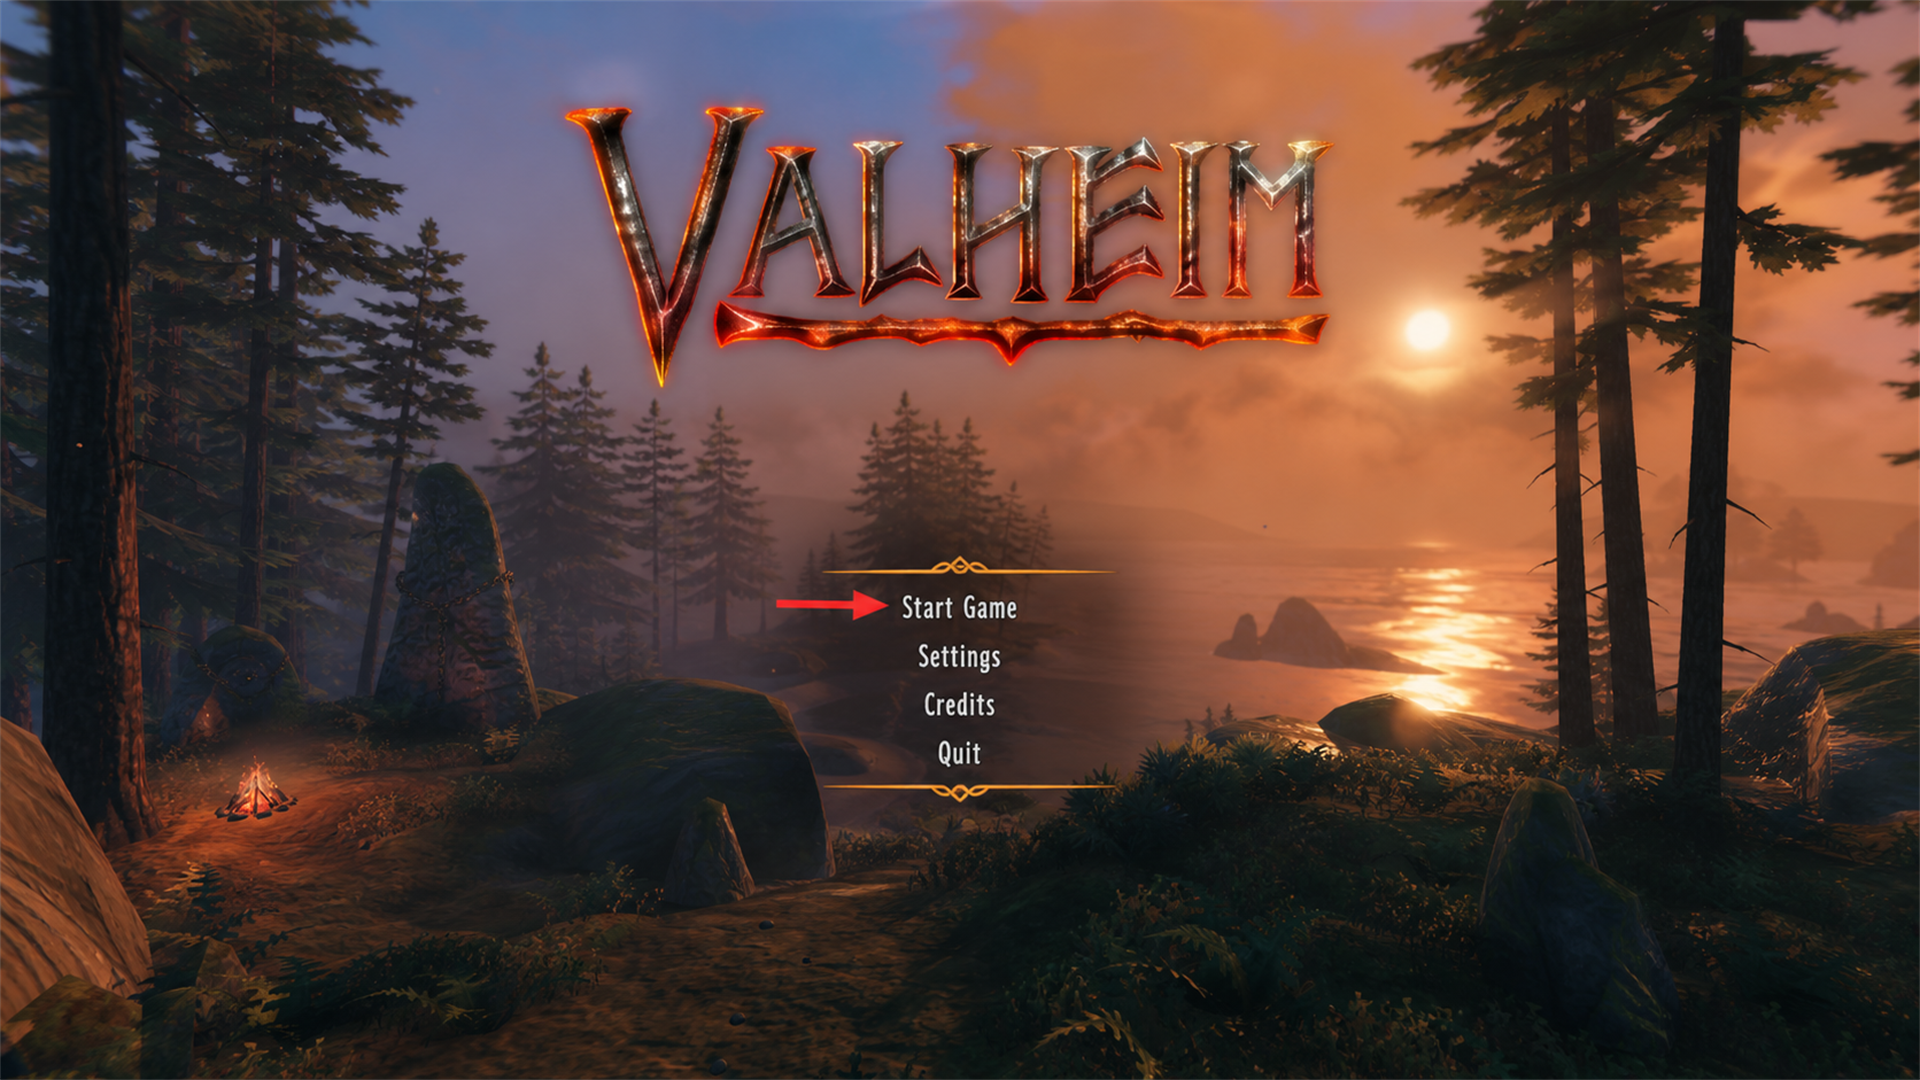
Valheim main menu with Start Game indicated
STEP 08

Open the Join IP screen

  1. From Valheim’s main menu, select Start Game.
  2. Select or create a character.
  3. Choose Join Game, then Join IP.
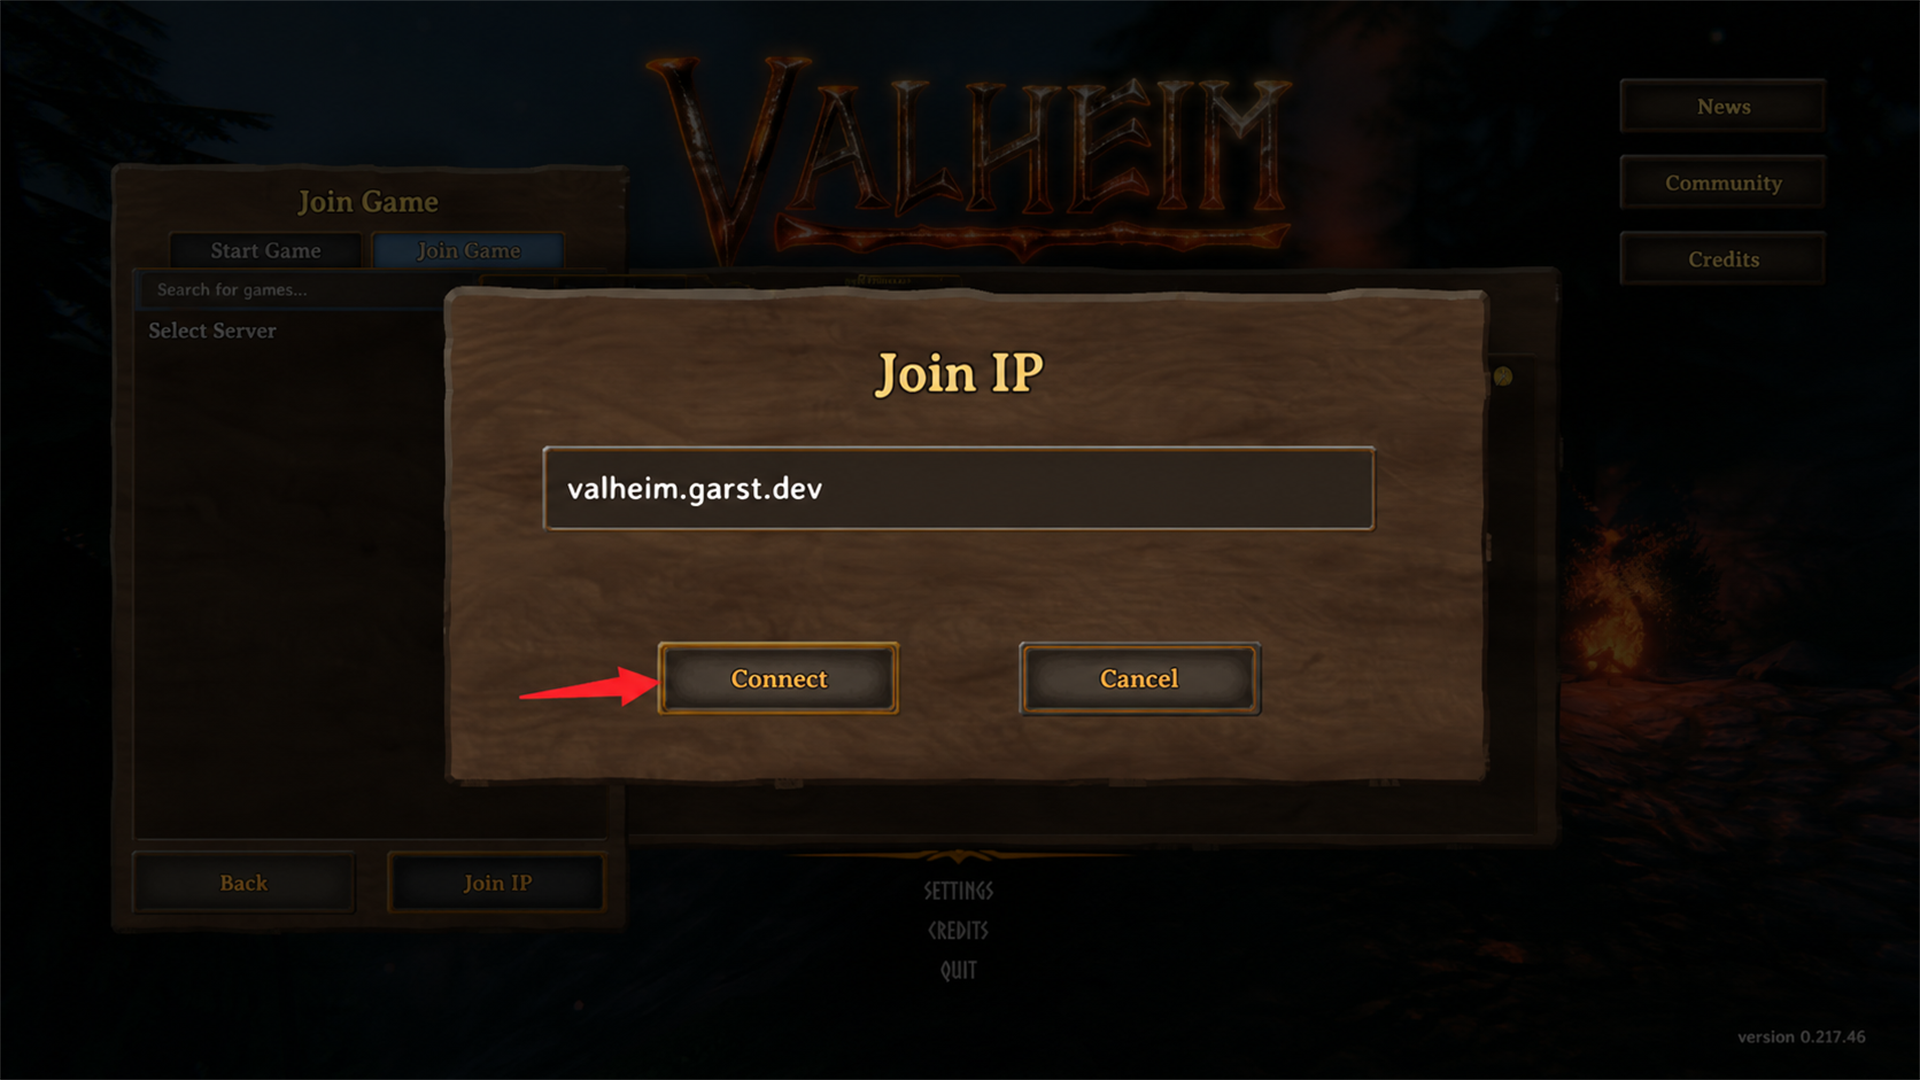
Valheim Join IP dialog containing the server hostname
STEP 09

Enter the server hostname or IP

Server hostname
valheim.garst.dev
Server IP address
100.121.136.39
  1. Try the hostname first.
  2. If it does not connect, enter the IP address instead.
  3. Select Connect.
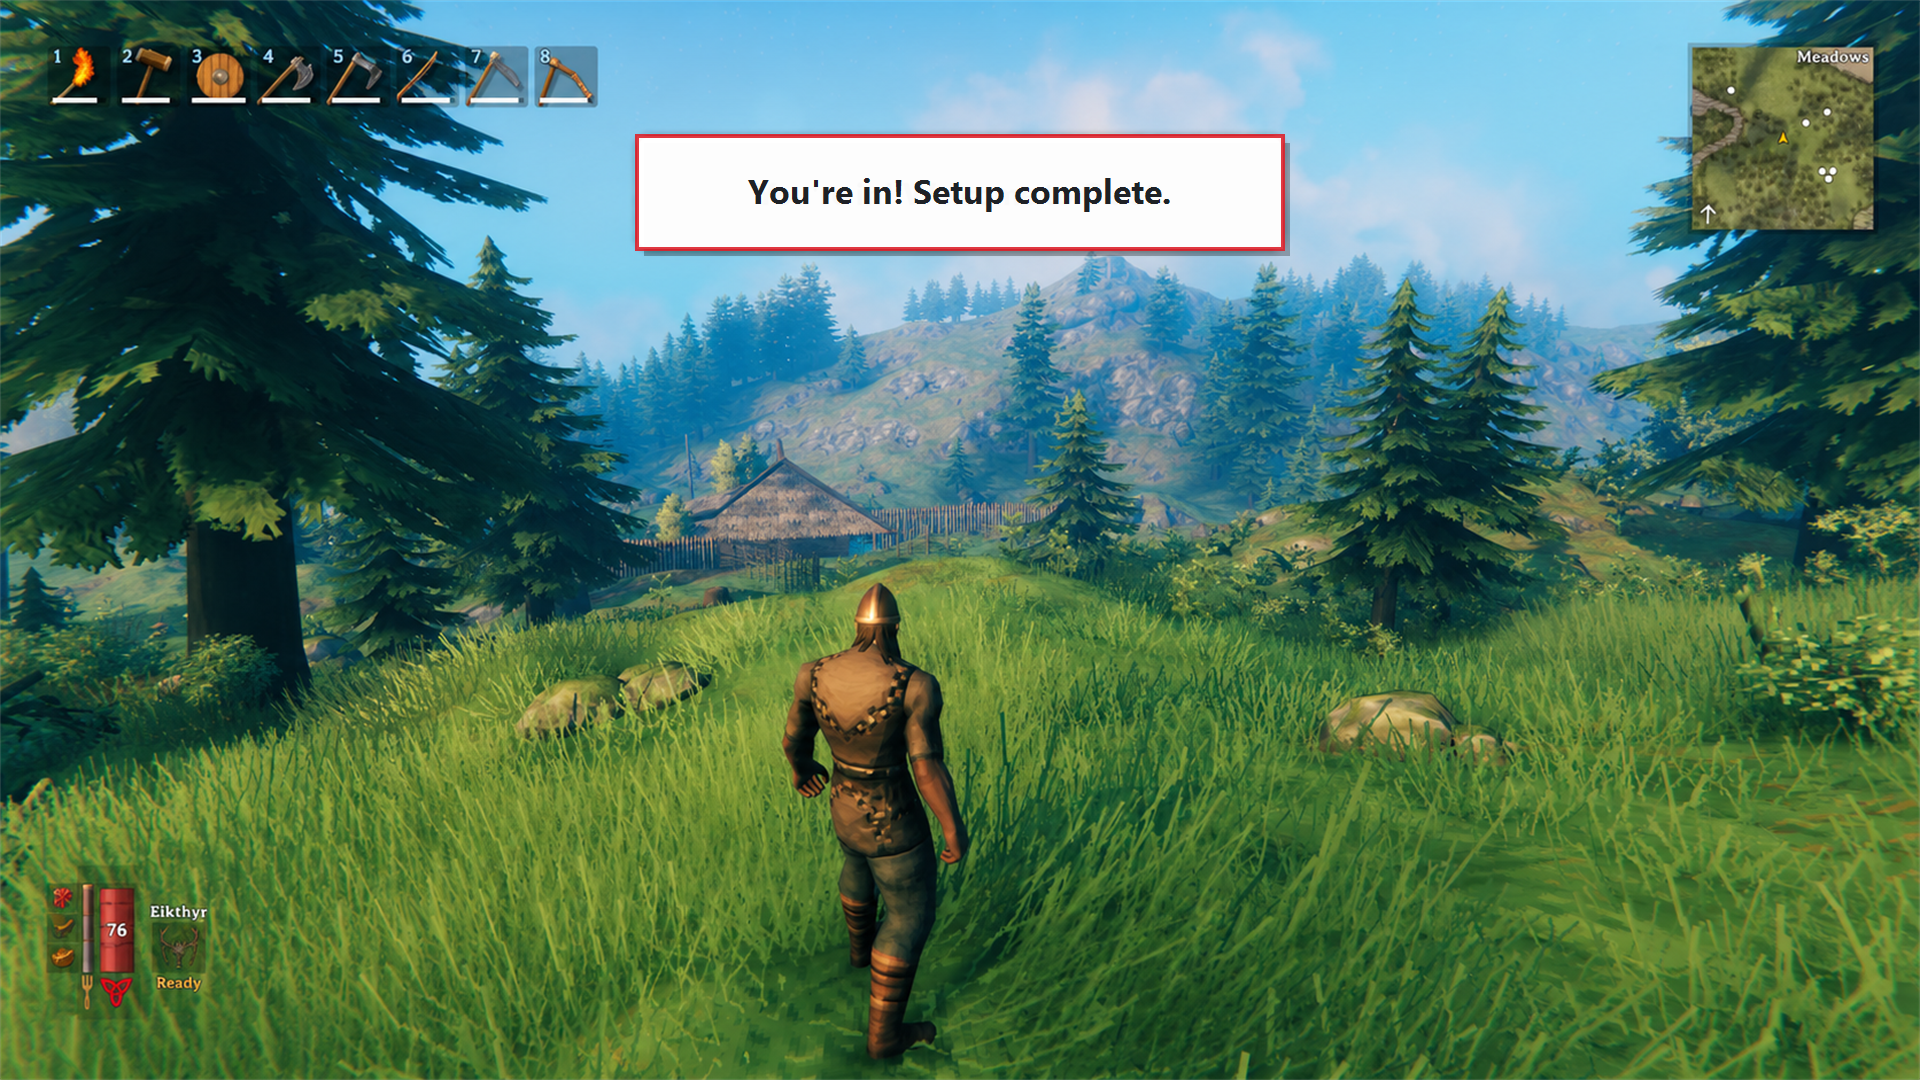
Illustrated Valheim in-world success state
STEP 10

You’re in

Future sessions are simple: confirm Tailscale says Connected, open r2modman, select the profile you imported, and choose Start modded.

Quick reference

The three values that matter

Profile code
019f6e14-5574-e6d0-27c5-2b11a3af8547
Server hostname
valheim.garst.dev
Server IP address
100.121.136.39

When something goes wrong

Three quick fixes solve most problems.

Connection times out

Confirm Tailscale says Connected. Try 100.121.136.39 if the hostname does not connect, then ask the host whether the server is online.

Incompatible version

Close Valheim. Open r2modman, select the profile you imported, install any offered updates, and relaunch using Start modded.

Profile code fails

Copy the complete code including all dashes. If it still fails, the host may have published a newer profile code.